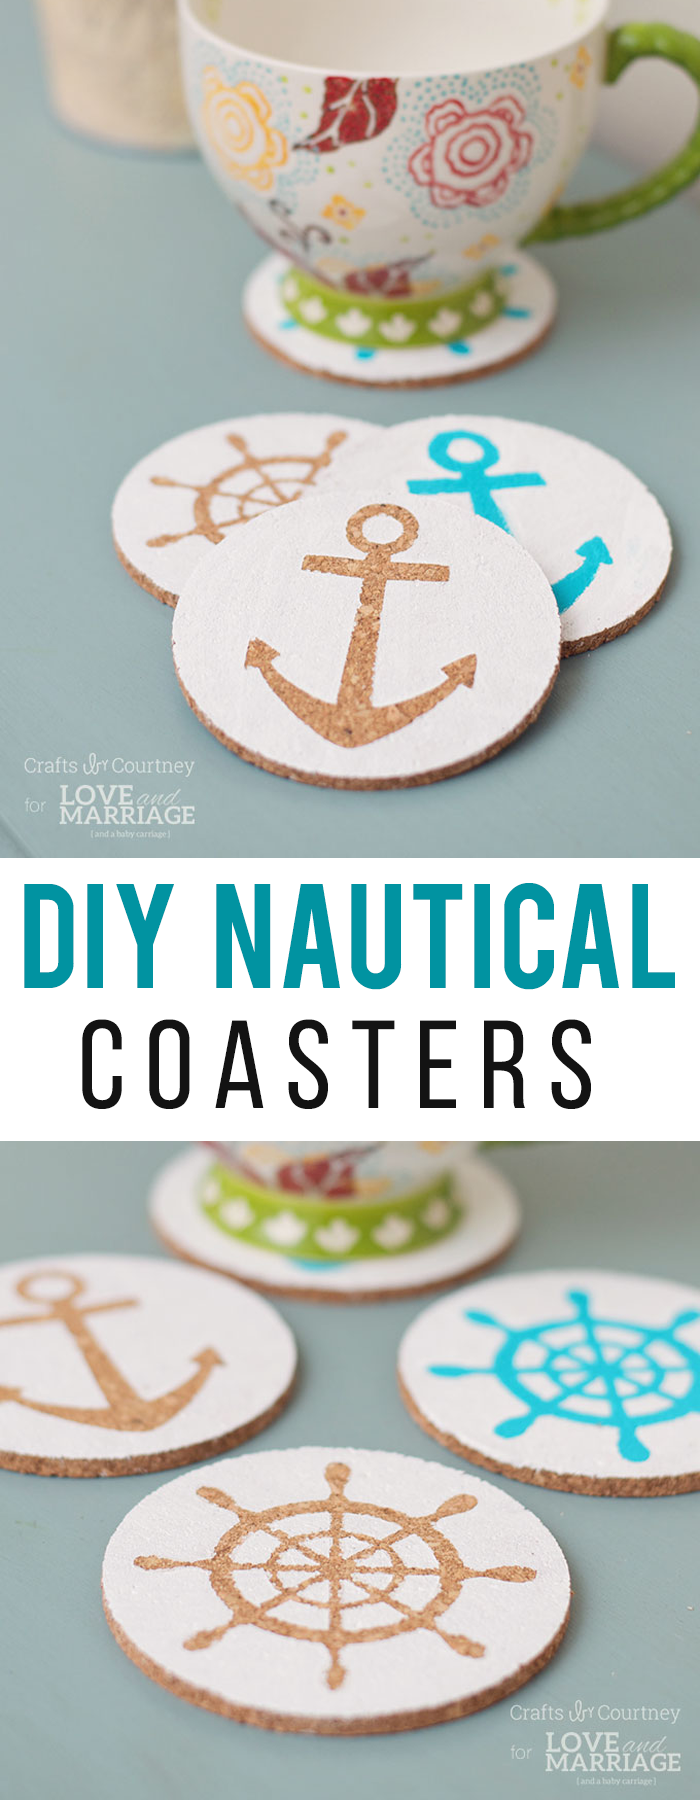
These Nautical DIY Coasters are an inexpensive and simple craft to make. We used these Dollar Store coasters, our Cricut machine and a few supplies you’ve probably already got at home.
So here’s the story…
I found these great cork coasters at the Dollar Tree and I knew I wanted to give them a quick nautical makeover for my office. I’m always bringing in coffee, water or even wine when I’m working and I hate messing up my pretty coastal desk. SO, I came up with a plan to give these inexpensive coasters a quick makeover to match my coastal decor.
Supplies
For this craft your going to need:
- Cork coasters
- Paint
- Vinyl
- Cricut or other cutting machine
- Paint brush
Getting Started
Since I already had the coasters on hand, it was pretty easy to get this project going. Next, I rounded up my paint colors and vinyl!!

Step 1 – Cut Your Shapes Out
I used my “Handy Dandy” Cricut to cut out my anchor & wheel in vinyl for the design on my coasters. I just loved them and thought they were super cute!

I laid out my anchor and wheel on the two of the coasters. I wanted to save the other side of the vinyl for the other two coasters. Don’t want to waste any vinyl shapes here!
Step 2 – Add Paint
Next, I added two layers of white paint on all 4 of the coasters and let dry 30 minutes. I wanted to make sure the paint was completely dry before adding my vinyl again.

Step 3 – Use Excess Vinyl Shape
Now that my coasters are dry, I’m going to use the extra pieces of my vinyl as a stencil now. Like I said, I hate wasting these great cutouts!
But this time, I wanted to add a “POP” of color to the coasters. So I found one of my favorite shades of blue…

I painted on the blue paint and let dry 20 minutes. Easy so far right?!!
Step 4 – Finishing Touches
Once all my coasters were dry, I peeled up my vinyl with my “Handy Dandy” weeding tool to show off my pretty designs. I’m so excited with how they turned out!

As you can see, this is a pretty simple project (my favorite kind) and you can customize your coasters any way you want!! I can’t wait to display them in my living room and office!

This was my FIRST stenciled cork craft and I think it turned out pretty great. Since these coasters only costs a $1.00, I think I will be making a lot more.
Hi, I’m Courtney! I am a mommy to 3 great boys and wife to a LOVING husband. Crafts by Courtney is where I make easy-to follow craft tutorials and post all the do-it-yourself parties I’ve made!
Leave a Reply